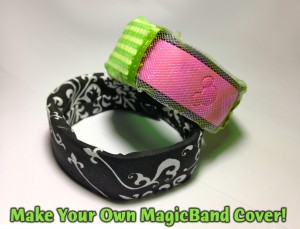
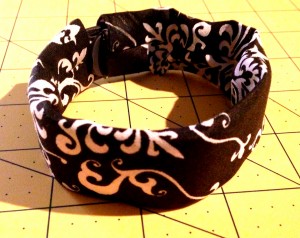
 One of the accessories you can get for your Disney MagicBand is a “CoverBand.” This is a fabric cover that slide over your MagicBand. A CoverBand is not just a fashion statement; it’s particularly helpful in keeping your wrist comfortable and dry while wearing the MagicBand. Not everyone wants or needs one, but I loved it.
You can buy a CoverBand at Disney resort hotels for $6.95 each or $15.95 for a 3-pack … or you can make your own at home! The first tutorial below offers simple, no-sew instructions. If you’re comfortable sewing, I’ve got a tutorial for a stitched version with a transparent window so you can always see where your Mickey sensor is located.
No-Sew CoverBand Tutorial
1. Get some 100% cotton or linen for maximum coolness and moisture wicking. The least expensive way to acquire this fabric is to go to a craft store like JoAnn’s and purchase a “fat quarter” (located near the muslins). Fat quarters come in cute designs!
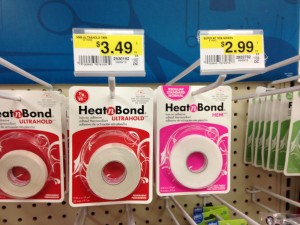
2. Buy a small roll of 1/4″ wide iron-on adhesive, such as Pellon E-Z Steam or Heat-n-Bond two-sided, pressure sensitive tape. You’ll also find this at JoAnn’s or another craft store.
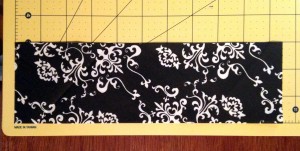
3. Cut your fabric to 3″ x 10.5″. I cut my fabric on the bias so it would be stretchier, but if you don’t know what that means or don’t care, don’t worry about it — just cut your fabric down to the size.
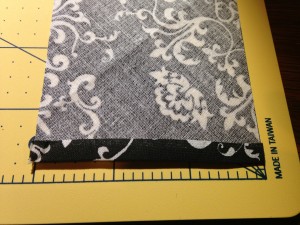
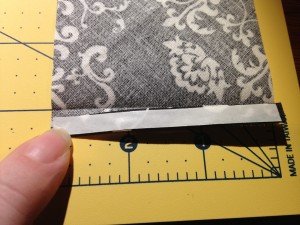
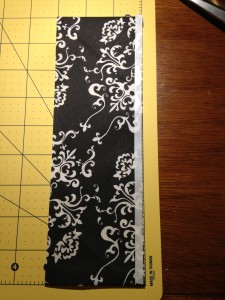
4. Flip your fabric over so the wrong side is down and fold the narrow edge up by 1/4″.
5. Now cut a 3″ strip of your iron-on adhesive and apply to the folded edge. Get as close to the edge of your fabric without going over.
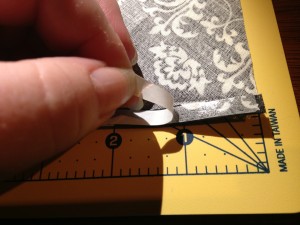
6. Remove the paper backing from the iron-on adhesive strip.
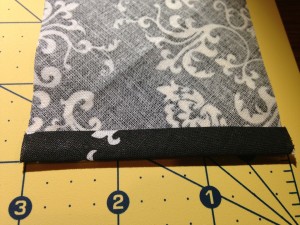
7. Now carefully fold the fabric again so that the adhesive you just applied is against the back side of the fabric.
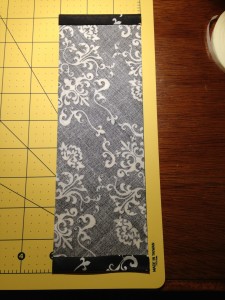
8. Repeat steps 4-7 for the other end of your strip of fabric.
9. Now flip your fabric over to the right side, cut a 10.5″ strip of iron-on adhesive, and apply the adhesive along one edge, being careful to align it and not go over the edge. Remove the paper backing.
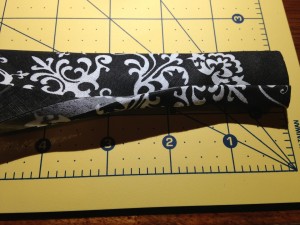
10. Now turn your fabric over so the right side is against your surface. Now fold both long edges over, so they meet and overlap by 1/4″ — the edge with the adhesive should be pressed up against the side without it, as seen in the photo below.
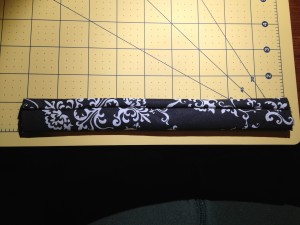
11. Now just press with your iron (follow the directions on your package — I had to press for 20 seconds). When done, you’ll have a long tube with no raw edges.
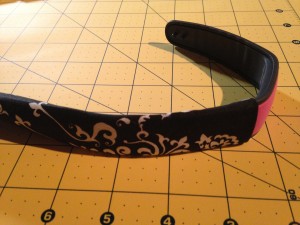
12. Now just slide it over your MagicBand!
The iron-on adhesive should work fine for these purposes — you’re not putting huge strain on the seams, after all. But if you’re comfortable with sewing, you can get fancier. Read on!
Tutorial for Stitched CoverBand with See-Through Sensor Window
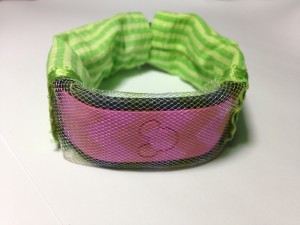
The big problem I had with the CoverBand I purchased at Disney was that I had a hard time knowing where my Mickey sensor was on the MagicBand. You have to center the Mickey sensor on the readers pretty accurately for your information to be picked up. So here’s how you can make a CoverBand with a see-through window so you always know where your Mickey is. The one in this tutorial was inspired by Tinker Bell.
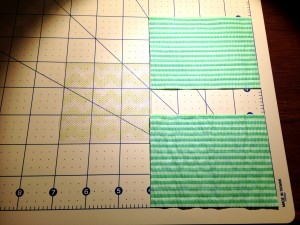
1. Get some cotton (I used seersucker) and some tulle at your fabric store. Cut two pieces of cotton to 3″ x 4″. Cut your tulle to 3″ x 3″ . (Note: If you have a bigger wrist, you may want to cut one piece of fabric longer to, say, 5″. If your wrist is smaller, cut one piece of fabric shorter to, say, 3″. )
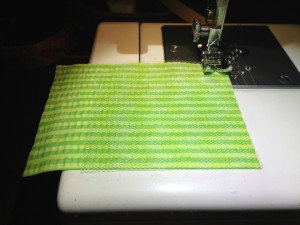
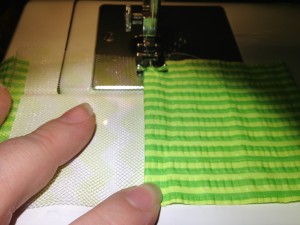
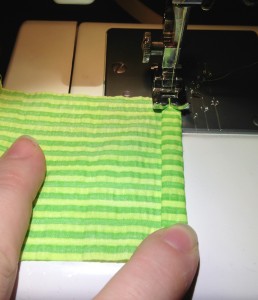
2. Align one piece of cotton to your piece of tulle along the 3″ side and sew down the side. Use a machine or hand sew it!
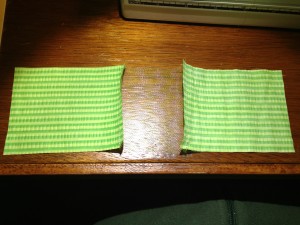
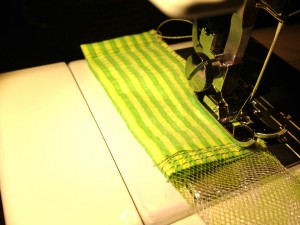
3. Sew the other 3″ side of the tulle to the other piece of cotton, paying careful attention to which is the right side and the wrong side. When you are done, it should look like this:
4. Now flip your sewn strip over to the right side, tuck the sewn seam edges under the cotton sides, and sew down — this will keep your seam from flipping up when you slide it on later. If you want to get fancy, you can also sew some ribbon along this edge.
5. Fold up the narrow 3″ edge of your sewn strip twice (about 1/4″ each fold) and sew down to make a rolled hem. Repeat for other 3″ edge.
6. Fold your strip in half lengthwise, wrong side out (right sides together) and sew down the long edge.
7. Go back along that same edge and sew a zig zag to reduce fraying.
8. Now carefully turn your tube inside out (I like to use a long stick to do this, as shown in this video) and slide it on your MagicBand!
These covers did not take long to make — about 5 minutes for the first, and 10 minutes for the second. I imagine one could get very creative and fancy. I would be careful to avoid light fabrics, fabrics that would retain moisture like flannel cotton, and fabrics that would irritate your skin or snag on things.
What do you think? Could you make one of these? Let me know about your ideas for your own CoverBands!



such an awesome idea!!!! Going in January and think it would be great to make our own!!! Thanks for the tutorial.
You had the tutorial up before I could even cut one out! Nice job! I’m going to make some this weekend in case my daughter wants them. I figure if we make them at home, she will be less tempted to buy them there and will save her money for real souvenirs. Thanks for the tutorial.
Super cool. I think we might just do this for ours before we go in December. 🙂
I thought about making one without the net and then just pulling it around to expose the Mickey head after putting it on. Would that work? I think the net would get itchy.
Yes, that would work! It would also work to make two smaller covers and simply not have them meet at the sensor point. You could also substitute the net for another fabric that is translucent.
Tried it with a piece of spandex I had in the house and it worked great and pulled around easily to uncover Mickey. Now if I can only find some pretty spandex I think I have a workable idea. It also works to make them about 3X8 for bigger arms.
Yay! Do you have a photo? I’d love to see it! 🙂
LOL .. this looks horrible.
Bummer! Well, CoverBands aren’t for everyone. Would you wear none, or just a better-looking one? What are your ideas for how to make one? 🙂
These are super cute…and I think even I could make the no-sew version!
Do you have the finished size. I am trying to get the measurements of the bands and I am unable to locate the length, height, and width or the actual bands. Can you help. Can the bands work through the fabric or do I have to have the Mickey exposed?
Thanks so much for this pattern! I did the no-sew version because I didn’t feel like setting up my sewing machine. I only had 3/8″ tape, so I cut mine 3.5″ wide and it worked out well. I also adjusted the length based on who I was making it for. I may or may not have made 10 of them… :p
Thanks again!
Wonderful!!
do the MBs work through the fabric ? do you have to have the Mickey con exposed to activate the MB scanner??
Yes, they work through the fabric. I recommend making a window area, however, because you want to match the Mickey heads up and it’s easier when you can see where the Mickey head is on your MagicBand. The CoverBands Disney sold in October had no windows, but now they have a small hole in them just for this purpose. I used the Tinker Bell themed one on my last trip (the one with the window) and it worked great!
We are going in May, and I am hoping to make covers that are Incredibles-themed (I’m thinking red fabric with the Incredibles logo drawn on). Do you think cutting a small window in the no-sew version would work to expose the Mickey? It would also help us see our individual band colors so we can tell them apart. I can’t wait to try this!
Yes, that would work! Have a great time in May!